

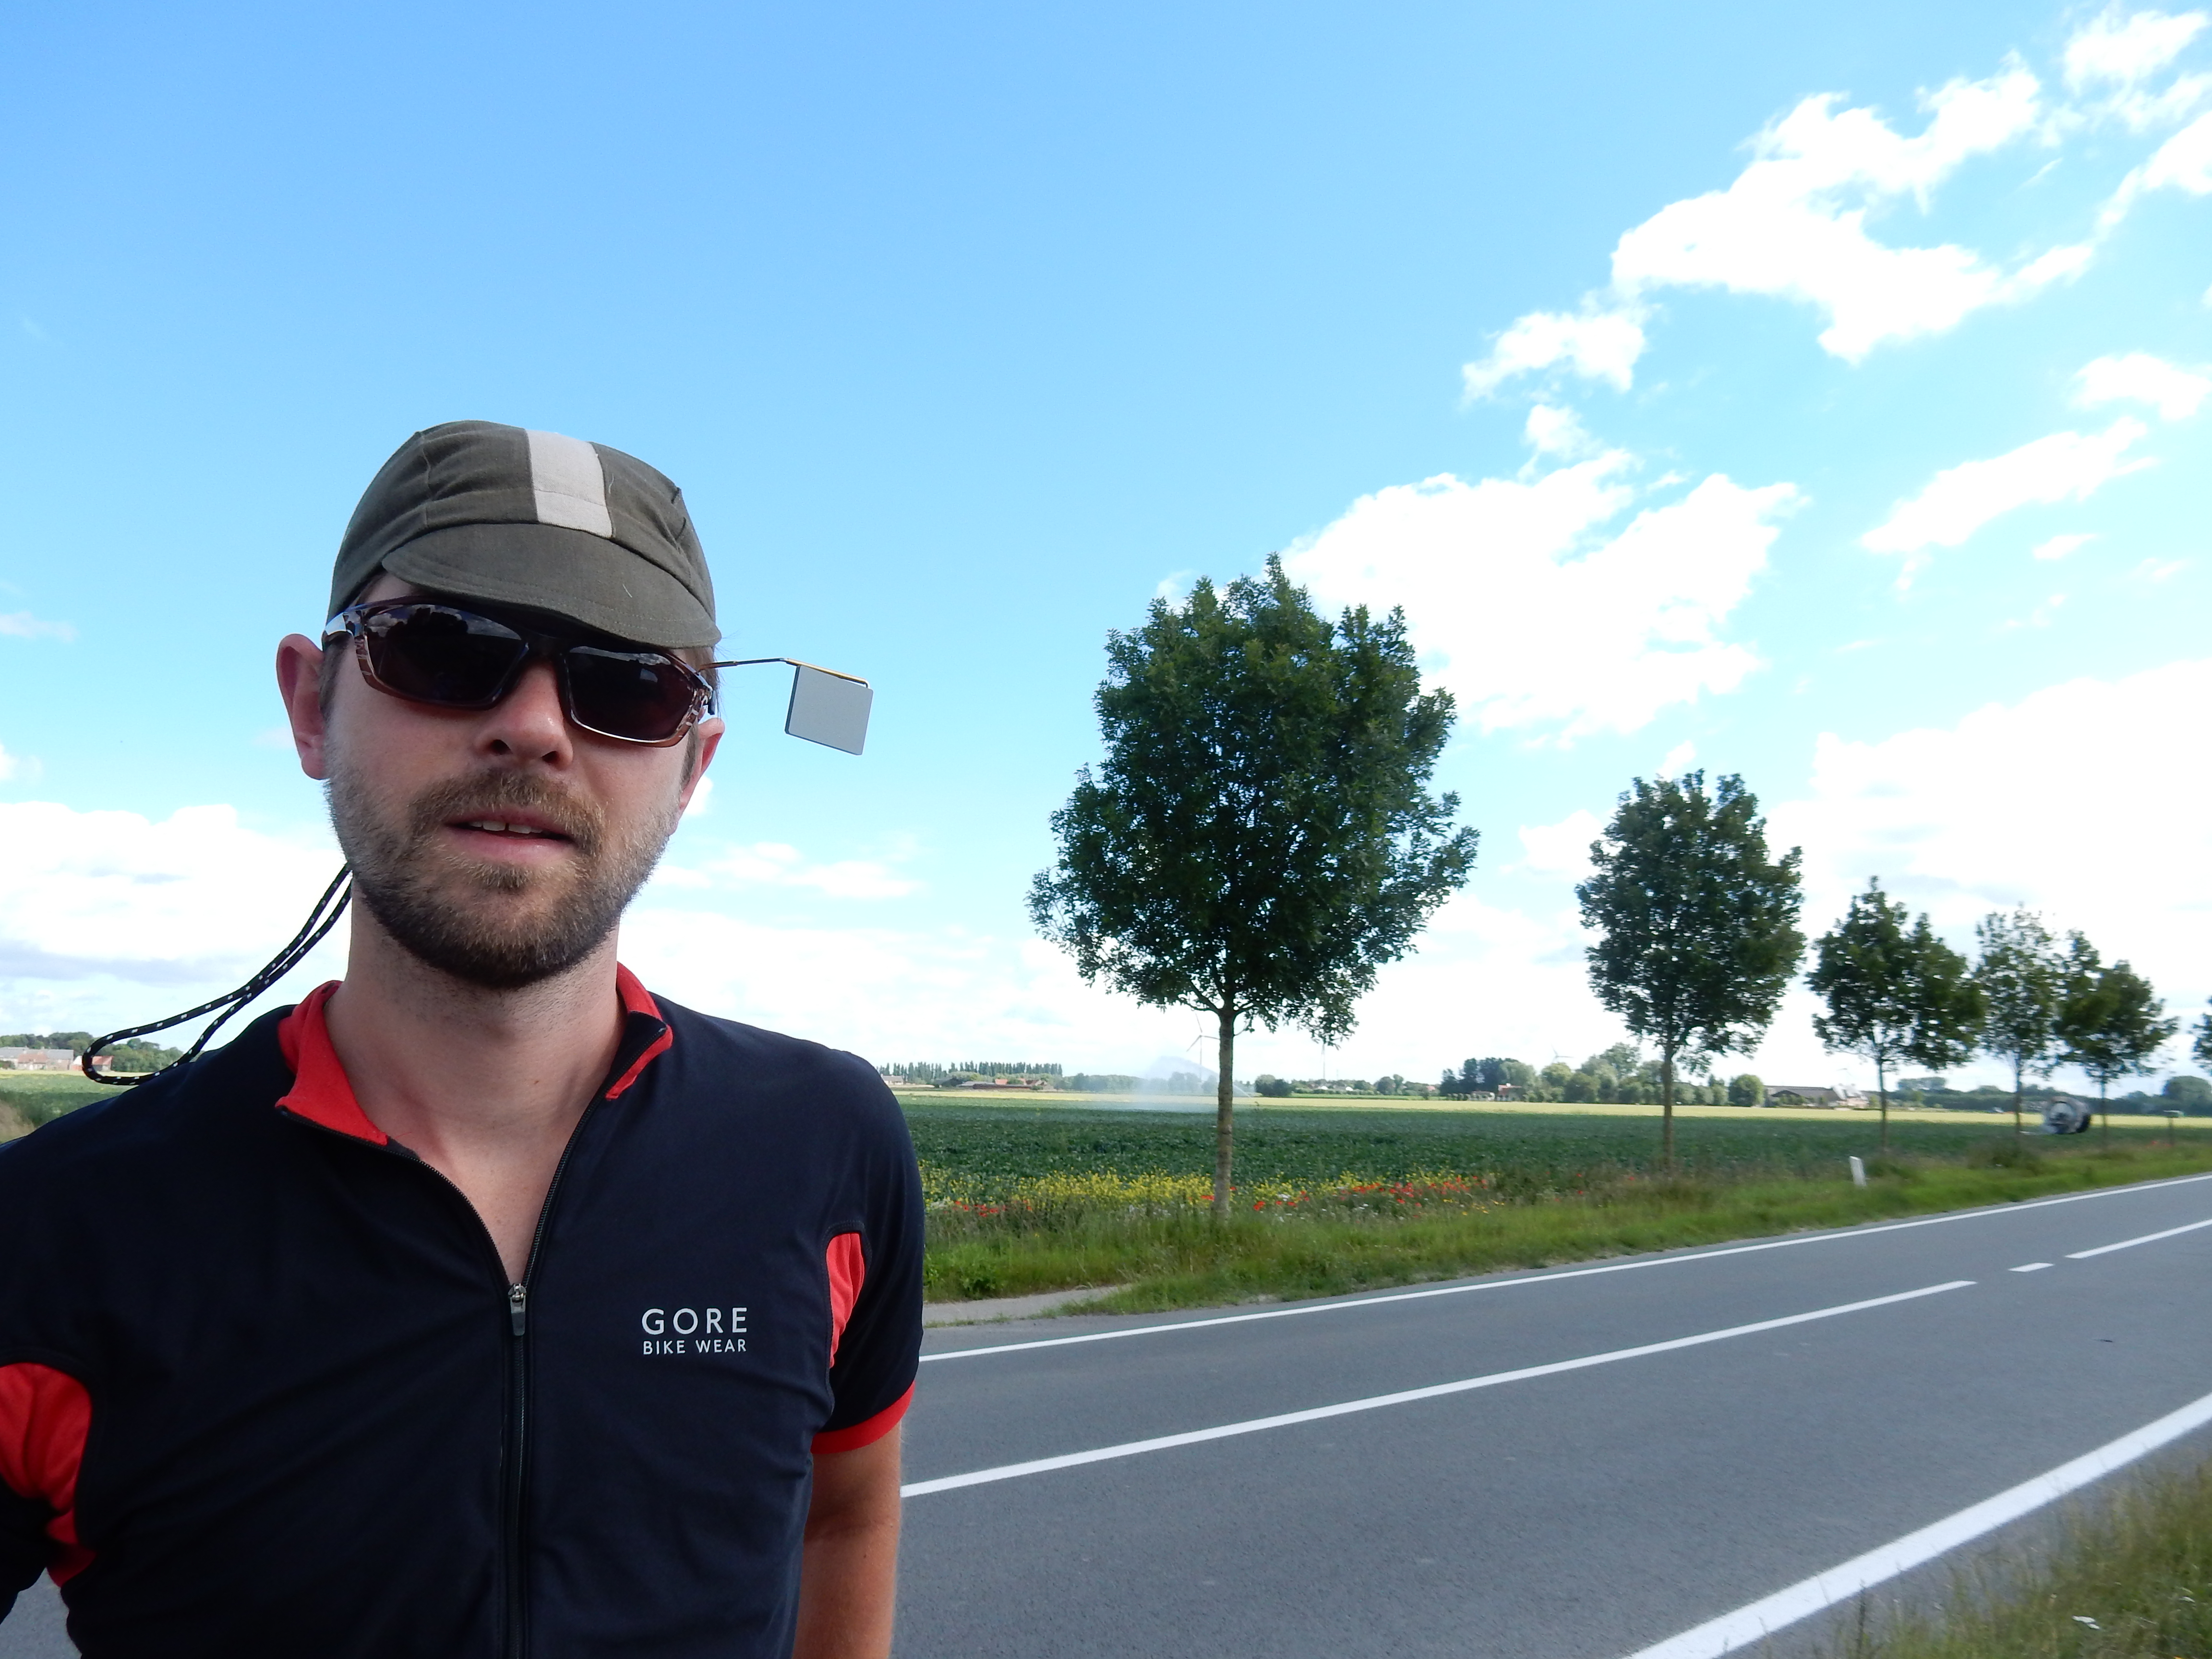
Neither of us had ever ridden with mirrors before, neither whilst commuting in London or on our other shorter bike tours. However, the advantages of being aware of what dangers might be approaching from behind and the ability to check on the straggler bringing up the rear (usually André of course!) was very appealing. So far, six weeks in, we would say they have been invaluable and something we have come to rely on when cycling.

After much research we both reached completely different conclusions (not unusual for us) on what type of mirror we wanted. André preferred the type you attach to your glasses and decided to purchase the ‘Take-a-Look’ mirror (unfortunately they don’t have a UK stockist but it can be purchased from several retailers in the states). I on the other hand wanted a mirror mounted to my handlebars and was very keen to get a Mirrycle mirror (also only available from the US it seems, click HERE for their website). After contacting them for advice on one that would fit my bike they very kindly sent me a mirror for free to test out!
Take-a-Look
The Take-a-Look mirror is made up of a rectangular frameless acrylic mirror which measures 28mm (height) by 37mm (width) and weighs 8.5 grams. This mirror is attached to a stainless steel wire with three rubber pads which are used to fix the mirror to the arm of your glasses, sunglasses or helmet visor. The wire extends 85mm. The mirror face adjusts by rotating it 90 degrees from the wire; and it rotates fore and aft for the fine-angle adjustments.
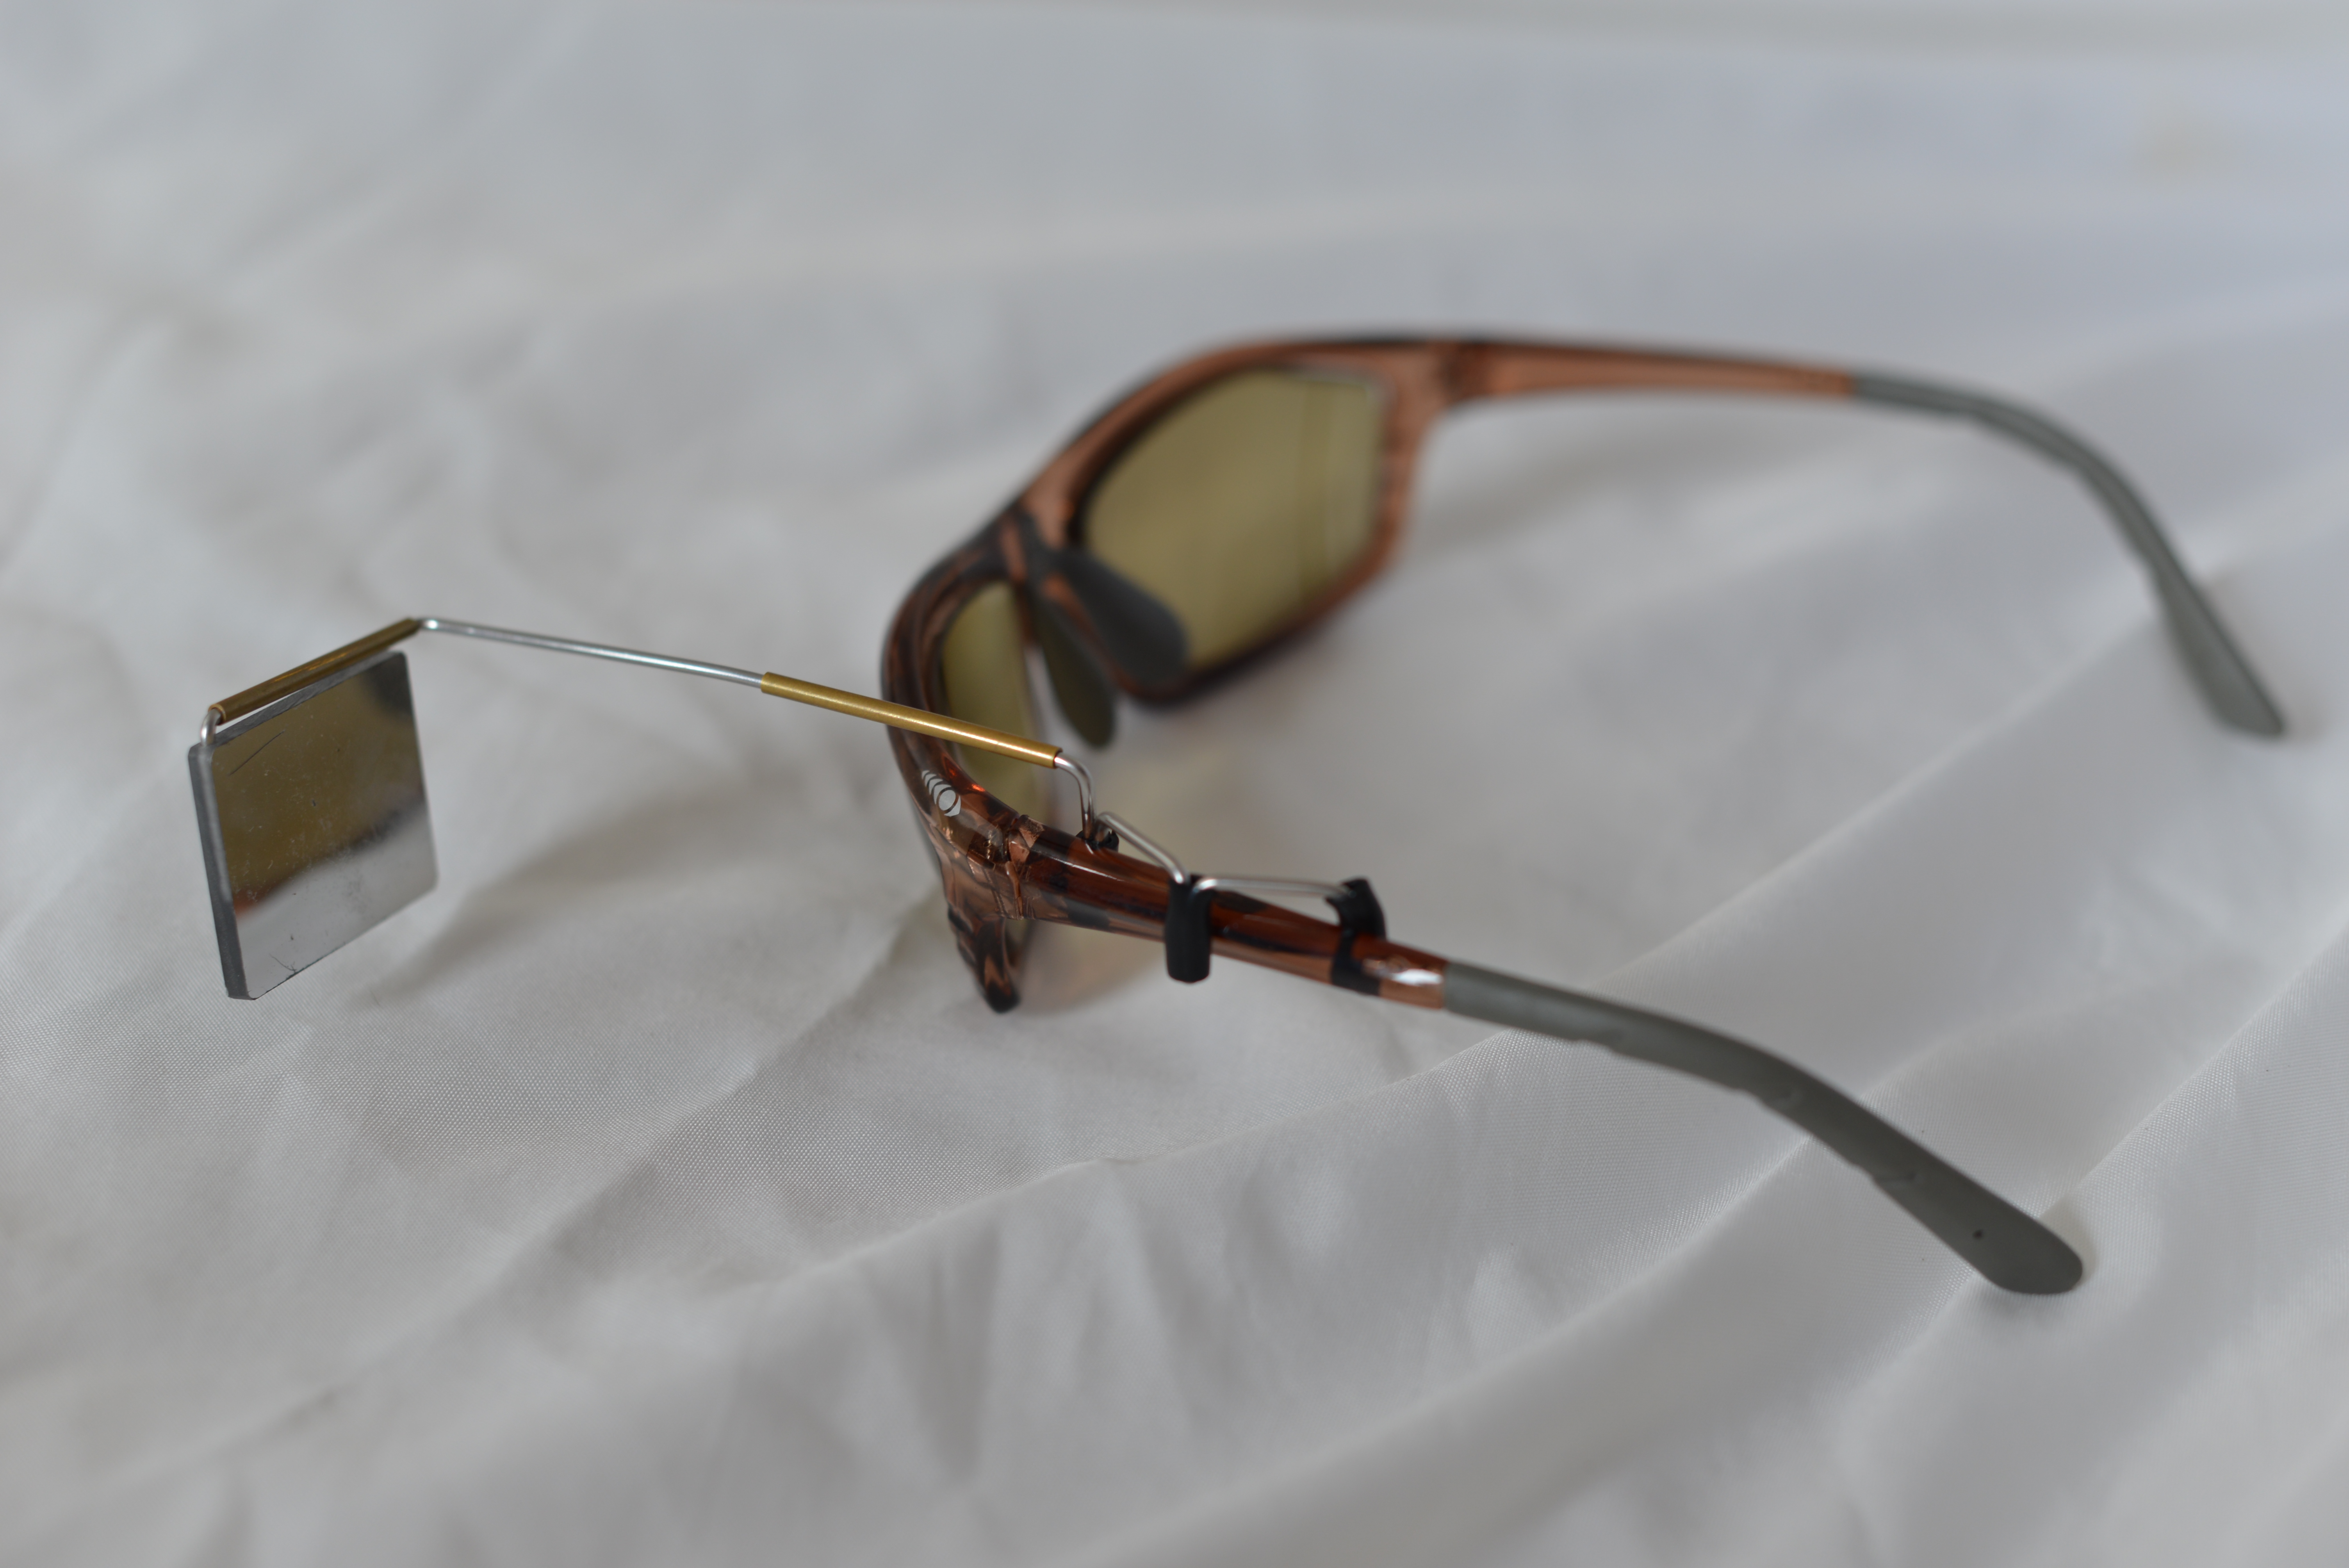
Perhaps the best quality of this mirror over a handlebar mounted mirror is the superior visibility range. For example; when turning a corner, in order to continue to see what is approaching from behind the wearer just needs to turn their head slightly to adjust the view. However, when using a handlebar mounted mirror and turning a corner your field of vision is usually filled with the back of the bike until the handlebars are straight again. The mirror is also very durable, the wire is malleable in just the right way, yet sturdy and there are no problems with vibrations interrupting your vision. Another plus point is the fact you don’t need to take your eyes off the road ahead to check what is going on behind you, and it is also easy to adjust whilst cycling.
A couple of minor downsides when compared to a handlebar mounted mirror – it is small and is therefore easier to lose or forget to put on before riding. You also need to be wearing glasses or a helmet – which isn’t a problem for André as he is usually wearing both, but is something to consider. Finally, unfortunately the Take-a-Look mirror already has a scratch and one of the rubber pads fell off which would have been a big problem if André hadn’t found it. Hopefully, the Take-a-Look mirror will endure the heavy use it will endure over the next year and will not incur any further damage.

UPDATE (Jan 2015): After 7 months of heavy use of the take-a-look mirror the little bugger has been scratched pretty heavily. Primarily from being taken off and put into pockets, and handlebar bags etc… It is still completely effective as a mirror on the road despite the damage. Initially I was a bit disappointed but considering the beating I have been giving the mirror over the past half year, I would still recommend the mirror to anyone.
I also got a new mirror sent out to replace the old one. (which I will now use for countries that drive on the left hand side of the road) – André
Mirrcycle
Mirrycle mirrors are all three inches in diameter and made from convex glass. There are four different types of mirror attachment for different brake/handlebar mounting options. However, Mirrycle don’t make a mirror that fits my style of drop down handlebar/brake/shifter set up. As a compromise they sent me their Mountain Mirrycle mirror which is intended for flat handlebars and mounts onto the bar ends. As I have bar end gear shifters I couldn’t fix them in my bar ends, but luckily for me André’s father rigged up a DIY mounting device. This meant the mirror could be attached at the end of the drop down bar next to the bar end gear shifter (see photo below) .

The positioning is slightly too low and my rear panniers and rack pack obstruct my view a little. In addition I initially found it a little bit harder to place my left hand in the drop down position as the mirror impeded it somewhat, although once used to it this is really not a problem. Overall this DIY mirror attachment is a great compromise and has so far worked out really well. Take note Mirrycle and get designing one that attaches to the handlebars!
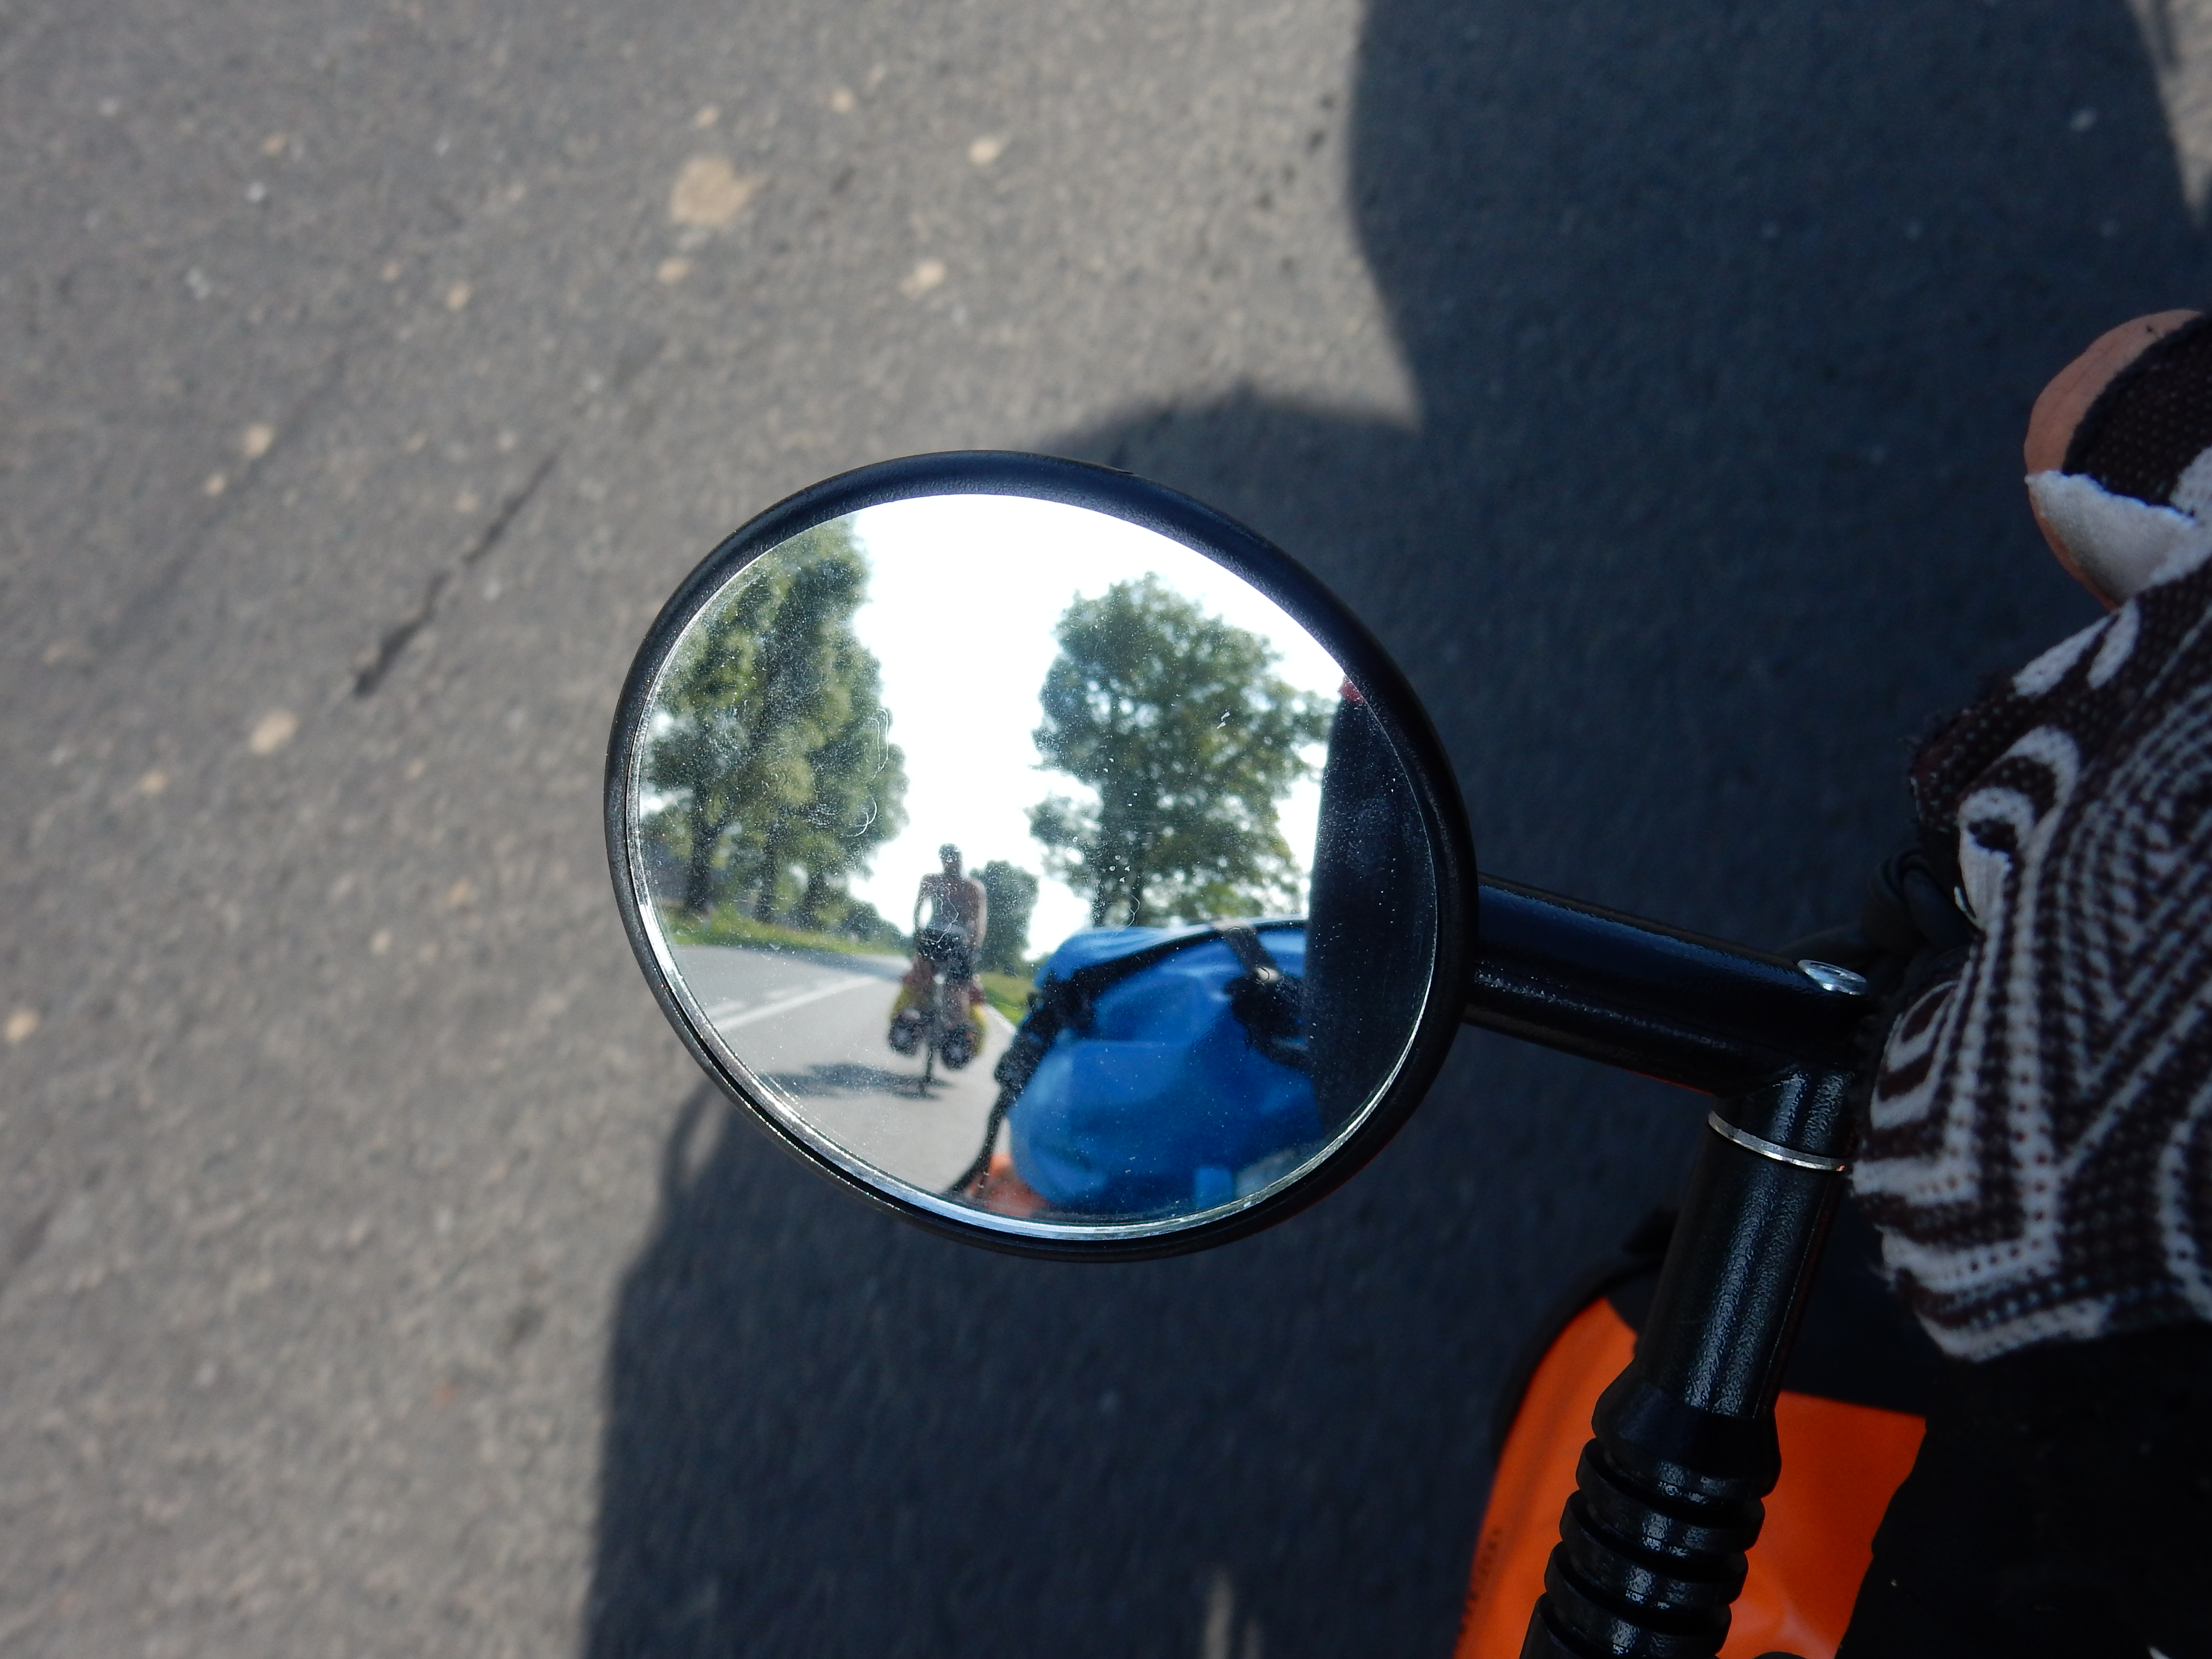
The mirror is very sturdy and does not shake or vibrate and it is also very easy to adjust the arms and the angle whilst riding. In addition I like the size of the mirror it is fairly large and I get a good view of what is going on behind me. The fact it is always mounted on my handlebars means that I cannot leave it anywhere or forget to put it on before I ride which is a definite plus point for me. The main downside I can see over a glasses attached mirror is that you have to take more care when parking the bike and leaning it against things. However, so far the mirror seems pretty robust which is great for this trip as it has already endured a few knocks and I am sure there will be many more to come.
To summarise, we are both very pleased with our choice in mirror and agree that there are pluses and minuses to both types but neither of us would swap the one we have!


Leave a Reply